Tag Archives: creative

Task 04 – Creating an Image for a Quote

Welcome back readers! This weeks task focuses on picking a quote and then creating an image using photoshop that represents the chosen quote.

Part One: Planning

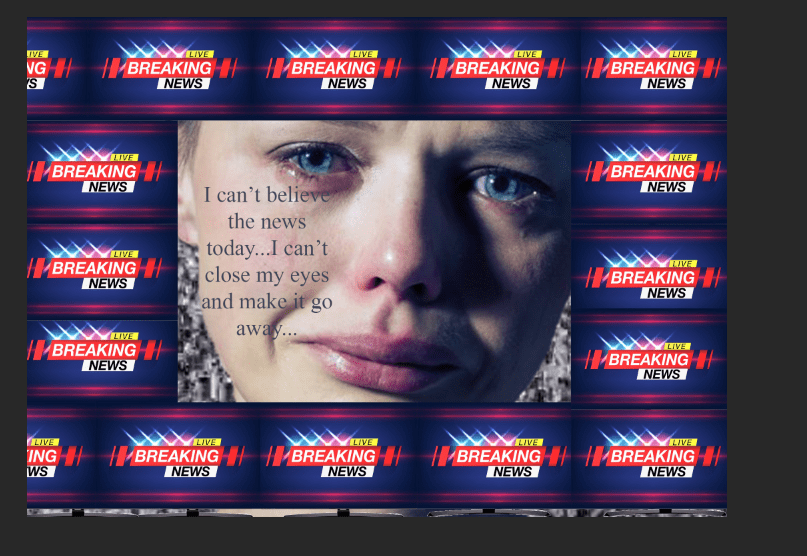
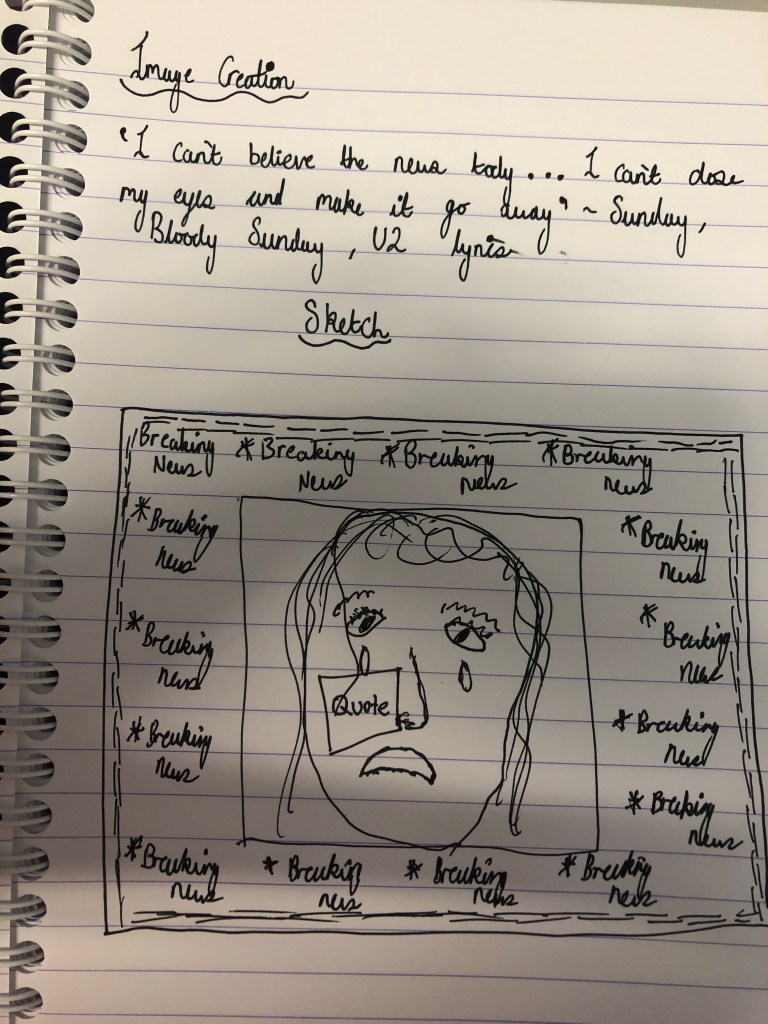
  • Firstly, I needed to pick a quote. The quote that I chose was “I can’t believe the news today/I can’t close my eyes and make it go away” – these are lyrics from the song ‘Sunday,Bloody Sunday’ by U2.
  • My initial thoughts when I looked at the quote was that I wanted to capture the emotion of somebody but have them surrounded by a bunch of televisions that were playing the news , then I envisioned the background being designed in a way that a TV looks when it loses signal. As I was thinking of this, I sketched it out to get a better idea of what the composition would be like.
My initial sketch.

Part Two: Designing

  • To create my image I used Adobe Photoshop and then I used google to find PNG’s of images that I wanted to include.
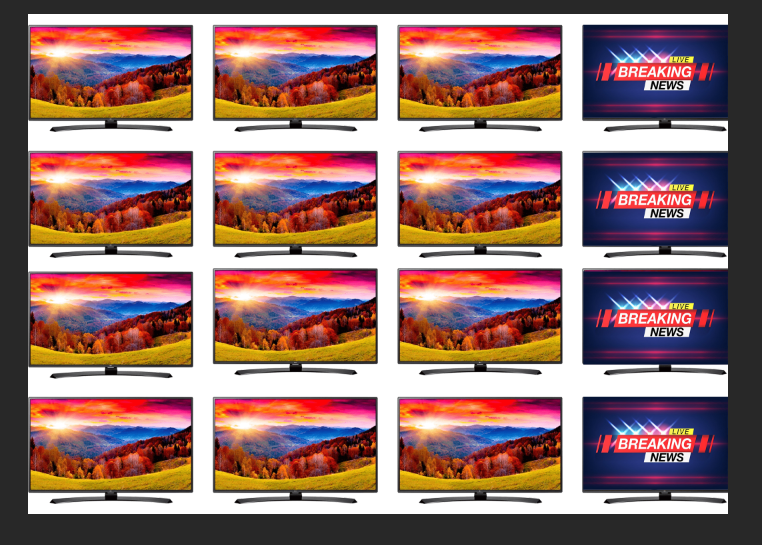
  • I found the shape of a TV that I liked the style of so that was the first thing that I imported, originally I thought about having the TV’s cover the background so that is how I positioned them.
  • Of course I wanted the TV screens to look like the news so I got an image of ‘breaking news’ and scaled it down to fit inside the TV screens.
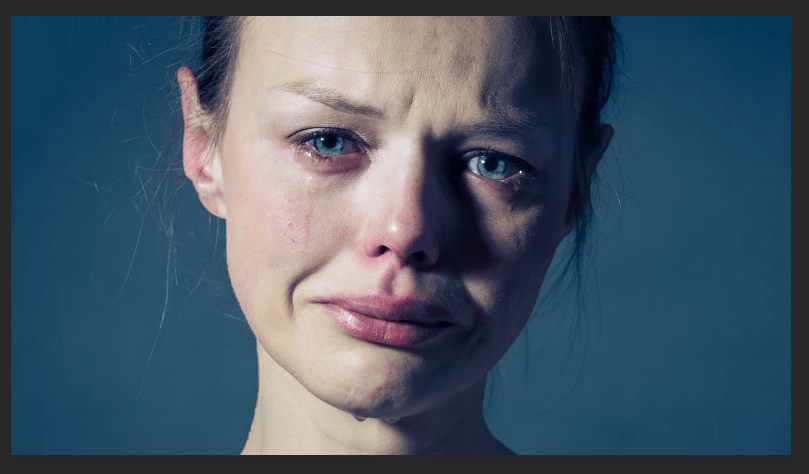
  • Next, was finding an image of a person that conveyed the emotion that I was looking for.
  • Pictured below is the image that I decided to use, as you can see it has a blueish/grey background which I wanted to get rid of. To do this I opened the layer separately, then I selected the ‘select and mask’ option.
  • Then where the transparency option is I increased that all the way up to 100%.
  • Underneath output settings , I selected decontaminate colours and then selected output to ‘new layer with layer mask’ and clicked okay which then cut out the face of the person from the background.
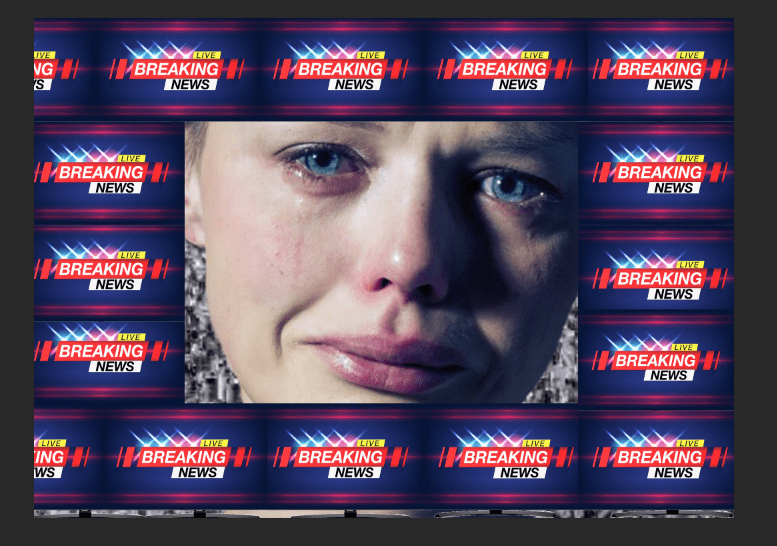
  • Once I had all the items for my image I then had to position it all together.
  • In the end, I decided that I wanted the breaking news signs to be framing the woman as I felt that would focus more in on her facial features. I also added the static in as the background, to make the arrangement correct I simply just swapped the order of the assets which is in the bottom right of the screen.
  • The final step to complete my image was adding in the actual quote, the typography is very important here for conveying the right emotion. The font that I selected was Mongolian Baiti as I felt that it looked quite serious and factual which fitted the mood of the image. I also chose to make the colour grey as it has quite a sombre feel to it.
  • I chose to position the text on the woman’s cheek because I felt that it represented a person crying as tears go down a persons cheek and I felt the words of the quote were symbolic of how a person that is crying would be feeling.
  • There is quite a contrast between the breaking news part of the image to the rest of it because it is so bright, however I feel that this works as it implies how alarming the news is and how much of an impact it has on the persons life as they are fading away into a dull background.
The final image.

Task 03 – How to create a motion graphic

The motion graphic that I created.

Welcome back readers! Today is a rather exciting blog as I am going to teach you how to make a motion graphic, this is actually really cool to do and up above I have posted a clip of the graphic that I created so you can have a quick look at that to see what the final product is supposed to look like at the end of the tutorial!

Step One: Adobe Illustrator

The first part of the process for me was creating each object on Adobe Illustrator, this step can be optional depending on whether or not you want to use your own artwork or if you want to use images for google (in which case you can skip to part 2 and begin from Adobe Photoshop). For me I really enjoy using Illustrator so what I did was I found an image on google of what I wanted , for example the UFO cartoon, and then using the Pen Tool I drew around each segment of it and then used the colour dropper tool to match the colours and then I managed to make the image that I wanted. I proceeded to then also do this with the aliens that I wanted to feature as well. Once you have created your design, delete the google image that you were tracing so you only have your copy on screen and then you want to go to the bar at the top , select ‘view’ and then select ‘transparency grid’. This will make the background transparent so then it will only be the artwork that gets exported. Finally, save your image and get ready for the next step.

Creating each object in Illustrator.

Step Two: Adobe Photoshop

Creating the Image in Photoshop.

In this part, you are basically collating all of your images together on Adobe Photoshop to create the vision of what you want the overall thing to look like. The background image of mine is something that I got from google but then the UFO and the aliens are all what I created on Illustrator and dragged onto Photoshop. I wanted to include some text as well so I used Dafont.com to find a font that would match the style that I was going for, thus ‘Alien Invasion’ was designed. Also, whilst putting it all together on photoshop make sure that each item is its own individual layer as this is important for the final step.

Step Three: Adobe Premier Pro

The final part (AKA the most important part) is where all the magic happens as here is where we take the graphic and add the motion. The programme that I used for this part is Adobe Premier Pro which is really good for editing and making videos. The first thing that you want to do is import your Photoshop file and then when it asks you about layers, make sure to select the option that separates the layers. Your screen will be split into about four different sections but you can adjust the size of each section depending on which part you are focusing on.

In the bottom left corner of the screen will be each item from the Photoshop file that you have imported and you can then drag each item separately onto the timeline in whatever order you want. To keep things simple, drag each item onto a different line so then you can focus on each one easier. From here you can then select each clip and adjust the length of it for however long you want it to last on the screen. In the screenshot below you can see the simple timeline that I created.

Making the timeline on Premier.

Adjusting the videos on the timeline enables a simple motion graphic but to make it more exciting you can play around with different effects on each clip to edit the movement. If you select a clip and then select ‘effect controls’ which is on the upper left of the screen you can then change things such as the position, scale and rotation. You need to actually click on the words (as you can see in the screenshot below they are blue as I have selected them which means that the changes you make will actually work).

Using the effect controls to move the items around.

Then if you notice the blue line going down the screen that indicates the point in the video that the clip is at. If you move the blue line then on the right side of the screen you will also see the video moving. Place the blue line where you want it and then proceed to make your effect changes, for instance if you hover over the numbers next to position and then either increase or decrease them then it will move the item horizontally and/or vertically. It then leaves a small diamond so you can see where effects have been inputted. You can then press the play button and see if you like it or not, if you don’t you can simply delete the effect that you added by selecting the diamond and pressing the backspace button on the keyboard. All you need to do is repeat this over for any other effects that you want on the clips and then you will have created your motion graphic.